So I finally was inspired enough to setup my LR4 for inside sleeping. I did this for a few reasons. One is just simplicity of setup/camping. Another is weight. The LR4 is a great platform for sleeping inside not just because it is a huge box, but it also has air suspension which with the right toys can be made to auto level 4.5 degrees of pitch and roll. So you can sleep level on a lot more types of ground without ever bothering to put maxtrax or rocks under your tires.
So first the drawers. Should I have built something? @Michael new drawer system got me thinking about drawers. I did some research and I had a choice here. Timeline wise buying something is certainly easier. I am no wood worker, but my dad is basically a pro. But when looking at weight and considering materials I could have built it out of, I think a DIY version would have ended up heavier than what I ended up with.
I choose the Front Runner drawer system. It is made to fully utilize the 3rd row area and has custom panels to fill in the sides and make them usable space. They are made with aluminum extrusion, aluminum/steel panels, L track and carpet covered plywood only on top. The bottom is open. Now that is a key point.. they are light where they can be and they are open under which will become useful to this project later.

Now the weight situation. The 3rd row seats in this thing weigh about 200 lbs. You would never guess they could possibly weigh that much just looking at them in the car, but holy hell. Also, I had previously remove the 2nd row middle seat for an ARB fridge and that seat alone was heavier than the fridge. With this plan I decided to also remove the 2nd row because it is a quick 5 minute task, just 4 bolts. I could take the platform/cabinets out for family mode easily.


So the drawer system is at least 30 lbs lighter than the seats I took out.. and it give me about 5" of space under the drawer system which I can access from the front or by pulling the drawers all the way out and lifting a top panel. Great place for spare parts for the rig. I can store coolant, oil, belts, coolant pipes, EAS sensors, whatever in there. I might be able to fit the awning walls for my 23 zero 270 awning also.
Next the platform cabinets to give myself (6'2") room to sleep and store gear.
So designing this in my head was a total fail. We really did have to just get out and measure and template with cardboard. We started with the floor panels. We had to add one support board out near the door to give us a flat surface, level with the drawers. We were able to use the M10 seat bolt holes to secure the boxes. The box has to be an odd shape to use the space well... angled on one corner. We also wanted to allow access to the 3rd row foot well area and leave room for the fridge to breath and access room behind the fridge.


So they ended up looking pretty weird for shape, but loosing the space behind the boxes wouldn't be as good. 3/4" on top, 1/2" for the rest.


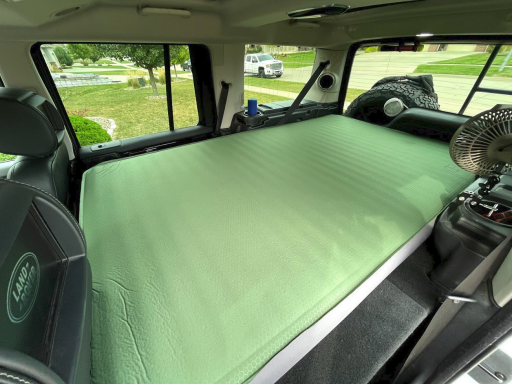
So the tops obviously don't need to be shaped the same. I wanted to be able to open them from each side and have it give me good sleeping area. We used piano hinges. I added some magnetic latches later. I'd like to add gas struts later also, but they stay up fine as it is. We upholstered as much as we could with the material we had, tops and sides and bottom inside. Matched the factory and front runner drawers very well. My dad is amazing... he built these start to finish in ONE day.

Driver side has a smaller lid so I can open it with my seat in the driver position without moving it. Passenger is a little larger and has a flip up panel on front to give my even more head space.


I can't begin to express just how HUGE these cabinets feel. I have room for days. I don't think I will need hardly anything out except my food bin, and I can leave my bedding out if I want or not.

Empty!?!? I have nothing else to put in here and the drawer side cubbies are almost empty too.

Camp kitchen stuff has more than enough room.

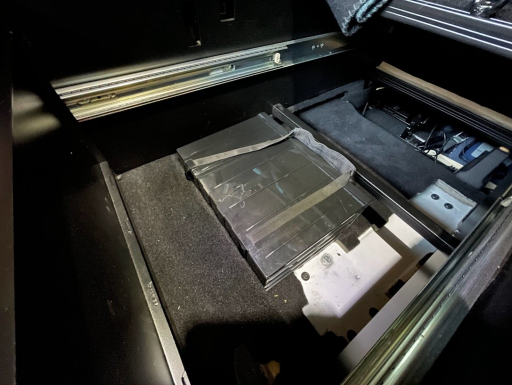
I installed an Xlifter module that lets me auto level the rig on uneven spots...

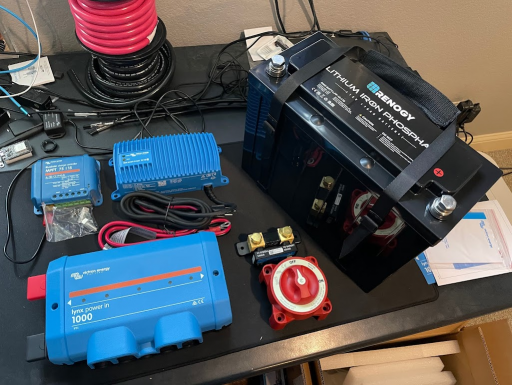
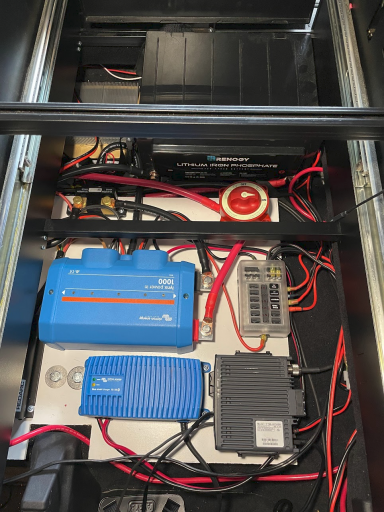
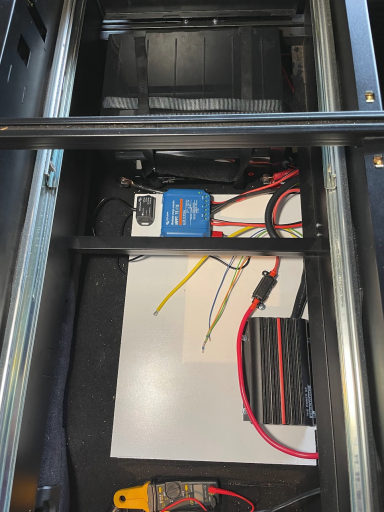
Relocated my air compressor to where the factory jack goes (I carry a safe jack kit so no need for it.) I also mounted my inverter to the other side of the drawer system in the side cubby.

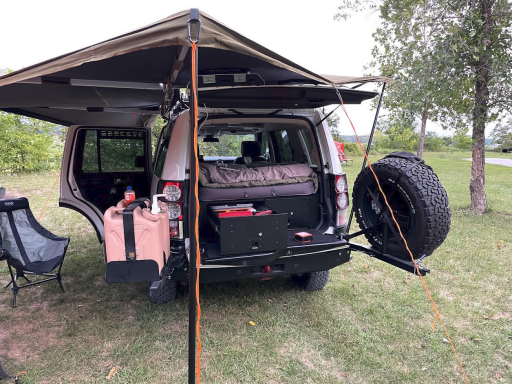
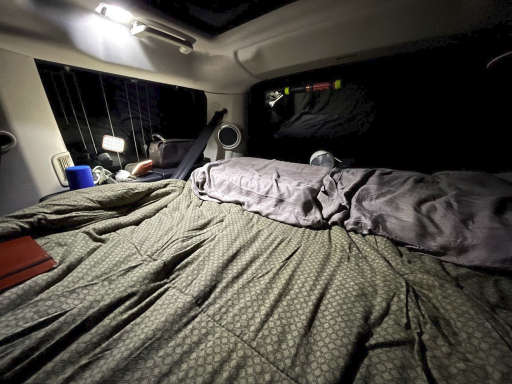
And to top it off... nice little vents that just slot into the windows, with mesh screen on the inside for bugs. Good ventilation right by my head.

So.... phew... I am excited to get out. Get to test this out in Moab in a few weeks here. Hope to see some of you out on the trails.

So first the drawers. Should I have built something? @Michael new drawer system got me thinking about drawers. I did some research and I had a choice here. Timeline wise buying something is certainly easier. I am no wood worker, but my dad is basically a pro. But when looking at weight and considering materials I could have built it out of, I think a DIY version would have ended up heavier than what I ended up with.
I choose the Front Runner drawer system. It is made to fully utilize the 3rd row area and has custom panels to fill in the sides and make them usable space. They are made with aluminum extrusion, aluminum/steel panels, L track and carpet covered plywood only on top. The bottom is open. Now that is a key point.. they are light where they can be and they are open under which will become useful to this project later.
Now the weight situation. The 3rd row seats in this thing weigh about 200 lbs. You would never guess they could possibly weigh that much just looking at them in the car, but holy hell. Also, I had previously remove the 2nd row middle seat for an ARB fridge and that seat alone was heavier than the fridge. With this plan I decided to also remove the 2nd row because it is a quick 5 minute task, just 4 bolts. I could take the platform/cabinets out for family mode easily.
So the drawer system is at least 30 lbs lighter than the seats I took out.. and it give me about 5" of space under the drawer system which I can access from the front or by pulling the drawers all the way out and lifting a top panel. Great place for spare parts for the rig. I can store coolant, oil, belts, coolant pipes, EAS sensors, whatever in there. I might be able to fit the awning walls for my 23 zero 270 awning also.
Next the platform cabinets to give myself (6'2") room to sleep and store gear.
So designing this in my head was a total fail. We really did have to just get out and measure and template with cardboard. We started with the floor panels. We had to add one support board out near the door to give us a flat surface, level with the drawers. We were able to use the M10 seat bolt holes to secure the boxes. The box has to be an odd shape to use the space well... angled on one corner. We also wanted to allow access to the 3rd row foot well area and leave room for the fridge to breath and access room behind the fridge.
So they ended up looking pretty weird for shape, but loosing the space behind the boxes wouldn't be as good. 3/4" on top, 1/2" for the rest.
So the tops obviously don't need to be shaped the same. I wanted to be able to open them from each side and have it give me good sleeping area. We used piano hinges. I added some magnetic latches later. I'd like to add gas struts later also, but they stay up fine as it is. We upholstered as much as we could with the material we had, tops and sides and bottom inside. Matched the factory and front runner drawers very well. My dad is amazing... he built these start to finish in ONE day.
Driver side has a smaller lid so I can open it with my seat in the driver position without moving it. Passenger is a little larger and has a flip up panel on front to give my even more head space.
I can't begin to express just how HUGE these cabinets feel. I have room for days. I don't think I will need hardly anything out except my food bin, and I can leave my bedding out if I want or not.
Empty!?!? I have nothing else to put in here and the drawer side cubbies are almost empty too.
Camp kitchen stuff has more than enough room.
I installed an Xlifter module that lets me auto level the rig on uneven spots...
Relocated my air compressor to where the factory jack goes (I carry a safe jack kit so no need for it.) I also mounted my inverter to the other side of the drawer system in the side cubby.
And to top it off... nice little vents that just slot into the windows, with mesh screen on the inside for bugs. Good ventilation right by my head.
So.... phew... I am excited to get out. Get to test this out in Moab in a few weeks here. Hope to see some of you out on the trails.