• HTML tutorial

Carnage_95YJ

Rank VII
Member

Expedition Master I

5,325
Matthews, North Carolina
First Name
Eric
Last Name
Casaburro
Member #

30727

Hey everyone!
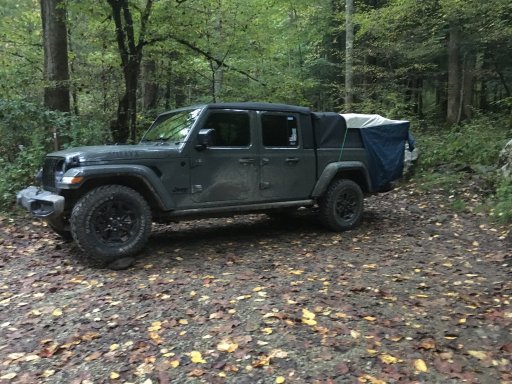
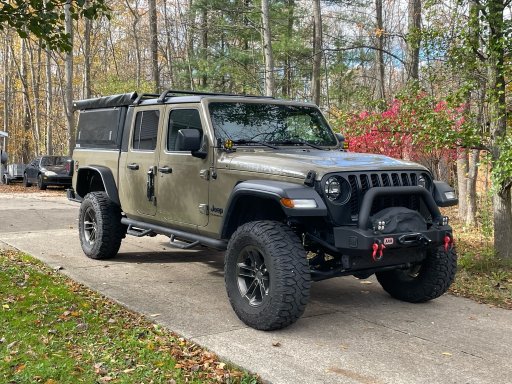
I wanted to use this first post in the thread to introduce Eventyr, my 2021 Jeep Gladiator Willys. The photo below is from April when I brought Eventyr home - all shiny and new!

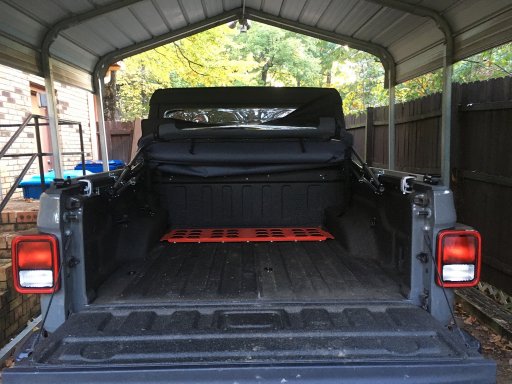
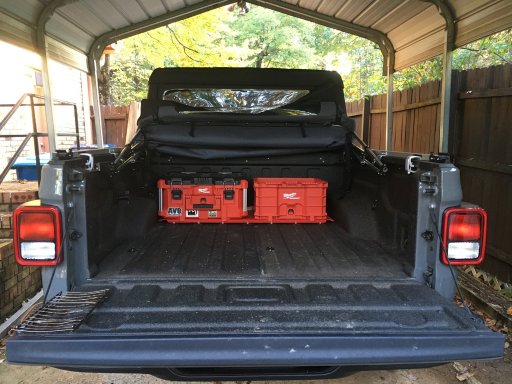
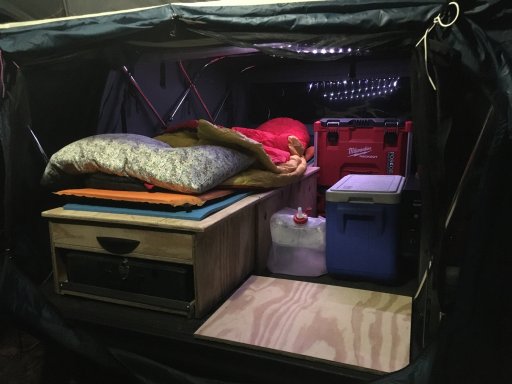
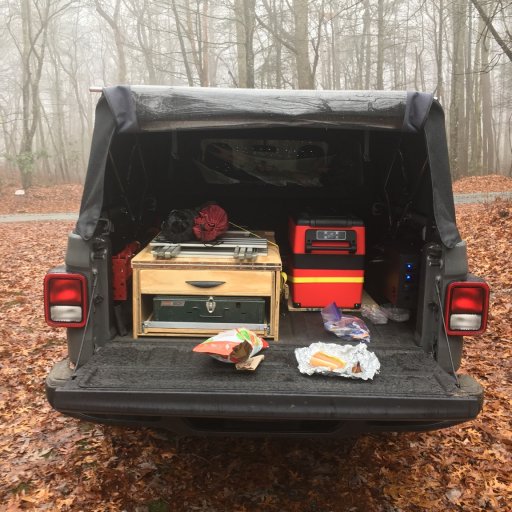
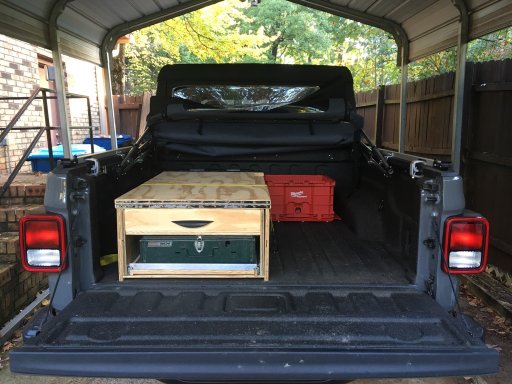
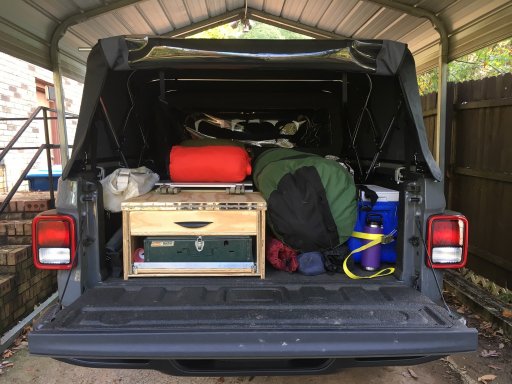
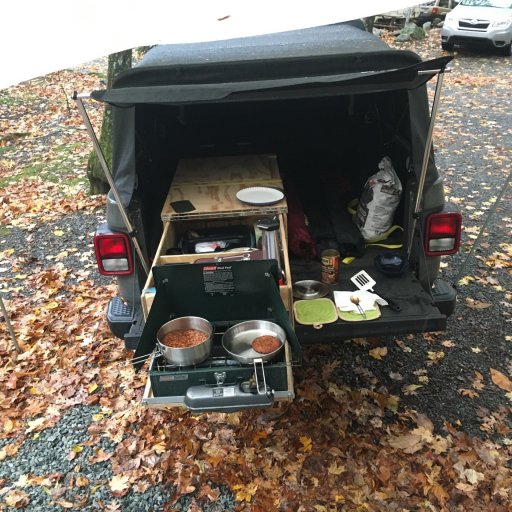
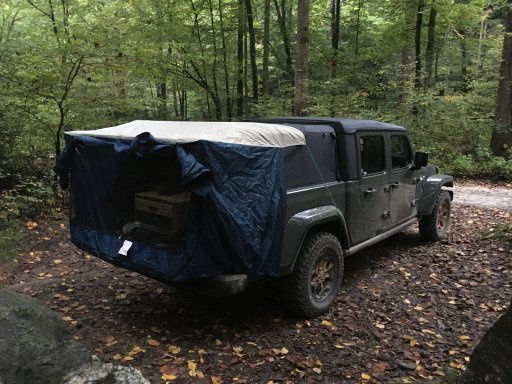
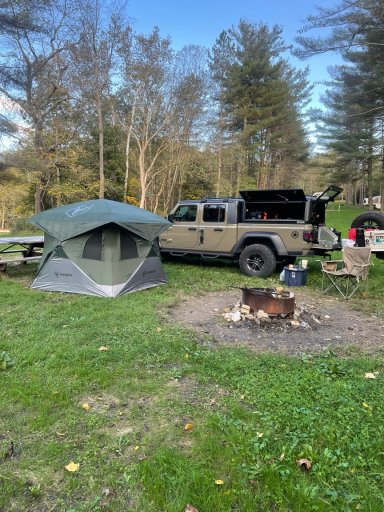
Eventyr is Norwegian for Adventure - and that is what this Jeep is made for: getting outside, getting muddy, and having a good time! My plans are to camp in the bed, be able to drop the top and doors, and still use the bed as a truck as necessary. So all the accessories will be bolt or strapped in and modular. More on that in a future post...

Current Status: Stock
Firestone Destination MT2 LT255/75R17
Stock wheels
No lift or suspension work (yet)
Rock rails
Skid plates

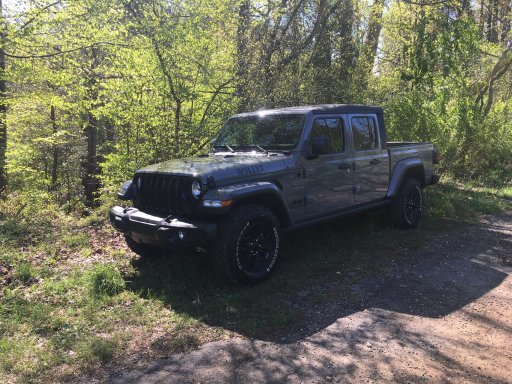
This photo was taken the day after I bought Eventyr.
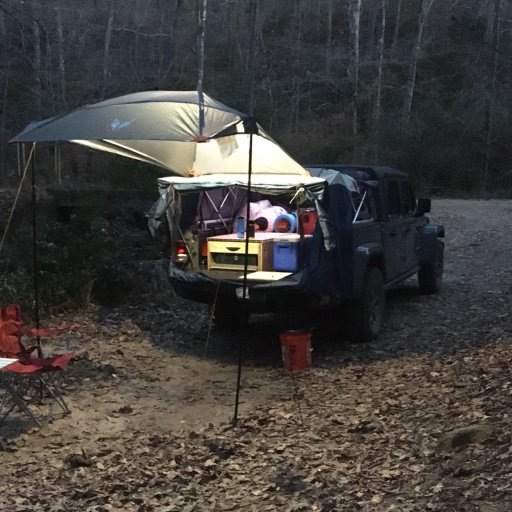
I went to Western NC to fly fish for the day. It was great to be able to open the top when I was driving and close it up when I walked the creeks.
IMG_4207.JPG
 

Carnage_95YJ

Rank VII
Member

Expedition Master I

5,325
Matthews, North Carolina
First Name
Eric
Last Name
Casaburro
Member #

30727

My Build so far...

Softopper camper cap
DIY kitchen/single sleeper
Milwaukee Tools Packout boxes
Packout custom mounting plate
Rough Country 12v 45L fridge
Eight13 Fabrication & Design Bed Side Compressor Enclosure, Large
DIY custom wiring for fridge, lights, device charging

What's Next:
DIY Custom Fridge Slide
Air compressor wiring
ARB Single air compressor
 

Attachments

Carnage_95YJ

Rank VII
Member

Expedition Master I

5,325
Matthews, North Carolina
First Name
Eric
Last Name
Casaburro
Member #

30727

My bed power build:
I wanted to be able to run my Softopper canopy lights, fridge, and some other accessories off a the battery in the bed of my Gladiator. After researching some options, I chose to start with the Eight13 Fabrication & Design Bed Side Compressor Enclosure, Large to house the 6 circuit fuse block and accessories. I calculated the total load of 40A and 22 feet of wire run and ordered breakers, wire, wire loom, ring crimps, heat shrink, the fuse block, and 12V switches and outlets from Amazon. I picked up incidentals like zip ties, sticky backs, stainless hardware, and wire grommets from Home Depot. (Photo 1)

First I started with wiring the Compressor Enclosure with the fuse block and 12V switches and outlets. I have three switches, two 12V outlets (one switched, one un-switched), two 3A USB outlets (one switched, one un-switched), the last switch is for future camping lights. There are plenty of spaces to add additional switches in the enclosure, as well. (Photo 2) Then I ran the wire from the engine bay to the bed following and zip tying to the frame and factory wiring. Once the Compressor Enclosure was installed, I wired in the power to the fuse block. (Photo 4) The 40A breaker had to be mounted, so I made a 4x12" aluminum sheet and bolted it in using existing bolts on the firewall. I hoped to use this to add wiring for the future compressor, but I will likely have to replace it with something that drops the fuses and relay lower due to the hood. (Photo 5) In Photos 6 & 7 you can see the completed enclosure with the outlets and switches.

This was a fun build that gives me room to grow the system. I plan on adding an ARB compressor and camping lights in the future.
 

Attachments

  • Like
Reactions: Ubiety and INVICTUS

INVICTUS

Rank III

Advocate I

709
Perrysville, Ohio, United States
First Name
Nolan
Last Name
Ellis
Member #

30244

Nice progress. Keep up the posts of your build. I also am putting together my JT. I have a RLD hard top and am deciding on weather to do the decked drawer system. I just mounted an ARB compressor under the hood. I built a minimalist rear bumper with higher clearance, i run a Riged spare tire carrier off the back.
 

Attachments

Carnage_95YJ

Rank VII
Member

Expedition Master I

5,325
Matthews, North Carolina
First Name
Eric
Last Name
Casaburro
Member #

30727

Nice progress. Keep up the posts of your build. I also am putting together my JT. I have a RLD hard top and am deciding on weather to do the decked drawer system. I just mounted an ARB compressor under the hood. I built a minimalist rear bumper with higher clearance, i run a Riged spare tire carrier off the back.
Thanks!
Your JT looks good! I’d like to see a closer pic of the bumper set up. Definitely have dragged a$$ on a trail or 2. Most bumpers I have seen don’t give much extra clearance.
I’m concentrating on the camping setup right now. Perhaps a lift, 35s, bumpers and winch in the future.
 
  • Like
Reactions: samba

Carnage_95YJ

Rank VII
Member

Expedition Master I

5,325
Matthews, North Carolina
First Name
Eric
Last Name
Casaburro
Member #

30727

Trip Report: SCAR Section 4 & SCAR Alternate
Last weekend I needed to get out of the house for a bit, and decided on a whim to quit looking at trail maps and get out there. So, I picked a starting point, packed lunch, and sent my wife an email with my planned route.

I started in Matthews, NC at 9:30 am and headed for the South Carolina Adventure Route Connector Loop (34.45021, -81.30068). I followed the designated route on On-X-Off-road Southeast to the SCAR Alternate Route (aka Liberty Hill) (34.55882, -80.79027). I completed Liberty Hill where it intersects with John G Richards Rd (34.47827, -80.80165). From there I followed Google Maps directions back to Matthews.

The route consisted of mostly broken pavement with sections of gravel, sand and - in the case of Liberty Hill - mud. The roads travel through small towns, farm land, pine forest and around the North end of Lake Wateree. Most of the road and trails are bordered on both sides by private property ranging from expensive waterfront homes to rundown trailers. The majority of this section can be done in any vehicle - no lift, off-road tires, or 4x4 required. The exception would be Liberty Hill. There were several large puddles, a small water crossing, and some sections with deep mud and ruts. I would recommend high clearance, good tires, and 4x4 for this trail. Watch out for fallen and downed trees. There were no real obstacles or any rock crawling on this trip, and I never aired down my tires.

Trip Stats:
My Rig - Stock Jeep Gladiator Willys
33”x17 Firestone Destination MT2
225.5 Miles round trip
19.2 MPG
6 hours, 50.5 minutes total engine running time
- - - -
<Photos to come>
 

Ubiety

Rank VI
Member

Explorer I

5,221
Sammamish, WA, USA
First Name
Greg
Last Name
Ubiety
Member #

6193

Ham/GMRS Callsign
Ribs
My bed power build:
I wanted to be able to run my Softopper canopy lights, fridge, and some other accessories off a the battery in the bed of my Gladiator. After researching some options, I chose to start with the Eight13 Fabrication & Design Bed Side Compressor Enclosure, Large to house the 6 circuit fuse block and accessories. I calculated the total load of 40A and 22 feet of wire run and ordered breakers, wire, wire loom, ring crimps, heat shrink, the fuse block, and 12V switches and outlets from Amazon. I picked up incidentals like zip ties, sticky backs, stainless hardware, and wire grommets from Home Depot. (Photo 1)

First I started with wiring the Compressor Enclosure with the fuse block and 12V switches and outlets. I have three switches, two 12V outlets (one switched, one un-switched), two 3A USB outlets (one switched, one un-switched), the last switch is for future camping lights. There are plenty of spaces to add additional switches in the enclosure, as well. (Photo 2) Then I ran the wire from the engine bay to the bed following and zip tying to the frame and factory wiring. Once the Compressor Enclosure was installed, I wired in the power to the fuse block. (Photo 4) The 40A breaker had to be mounted, so I made a 4x12" aluminum sheet and bolted it in using existing bolts on the firewall. I hoped to use this to add wiring for the future compressor, but I will likely have to replace it with something that drops the fuses and relay lower due to the hood. (Photo 5) In Photos 6 & 7 you can see the completed enclosure with the outlets and switches.

This was a fun build that gives me room to grow the system. I plan on adding an ARB compressor and camping lights in the future.
813 for the win! I have their under back seat "locker" and like it. Did not know that they have that box (compressor enclosure) that you used for power. Awesome!
Have you gotten your ARB single yet? If you pull the plastic engine cover off it leaves a nice space to mount the ARB single under the hood.
 

Carnage_95YJ

Rank VII
Member

Expedition Master I

5,325
Matthews, North Carolina
First Name
Eric
Last Name
Casaburro
Member #

30727

Been away from the computer lately working nights and getting out as often as I can.
I did complete the ARB Single compressor install in the bed box. I used the 813 under hood mounting plate for my breakers and extra wiring. I need to do a proper write up on it as well as my new DV8 rear bumper.
 
  • Like
Reactions: Advtres and Ubiety

Ubiety

Rank VI
Member

Explorer I

5,221
Sammamish, WA, USA
First Name
Greg
Last Name
Ubiety
Member #

6193

Ham/GMRS Callsign
Ribs
I have the collision detection goop which is going to limit my choice in rear bumpers. Have not gone looking but have not seen anything compatible either. Kind of eyeing the Barnes Pritchett canyon front bumper to replace my current smittybuilt front bumper. It does not have accommodations for the fog lights and that is what is holding me back. Fog light placement in the smittybuilt makes them worthless anyway, it’s a hulking beast and I had to remove the front most skid plate to get it to fit.