2019 4Runner TRD ORP “Slow Build”

  • HTML tutorial

tchughes

Rank IV
Launch Member

Traveler III

1,210
Central Arkansas
First Name
Tim
Last Name
Hughes
Member #

1710

I picked up a 2019 4Runner TRD ORP as a replacement for my 2003 4Runner Limited last July and due to work and COVID I’m just getting started. My last build thread was for a 2002 4Runner Limited and I enjoy looking back at the changes and the trips that it allowed me. I’ll use this post as a build thread and document trips going forward. Looking forward to your suggestions and comments.

2003 4Runner Limited (180,000 miles) traded in. I miss the V8. You can see my old 2002 Limited in the background my daughter drives now.


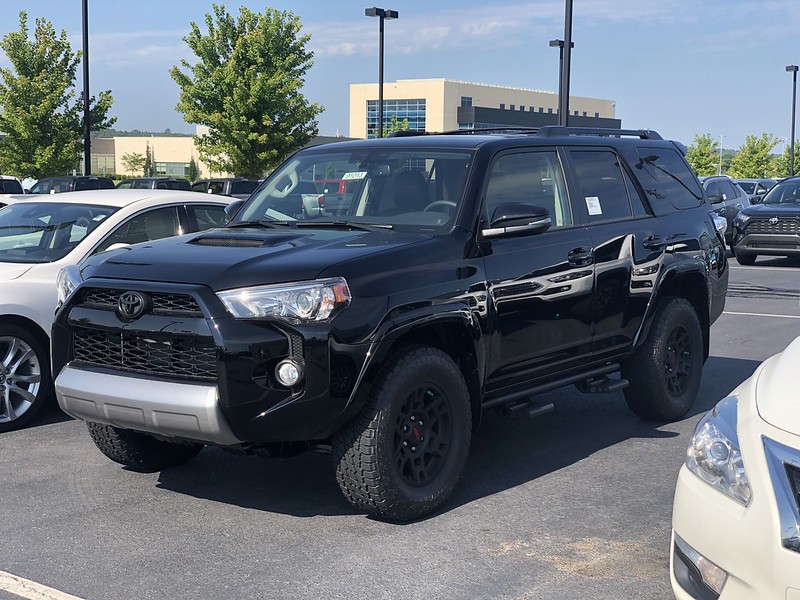
2019 4Runner TRD ORP Day I picked it up.


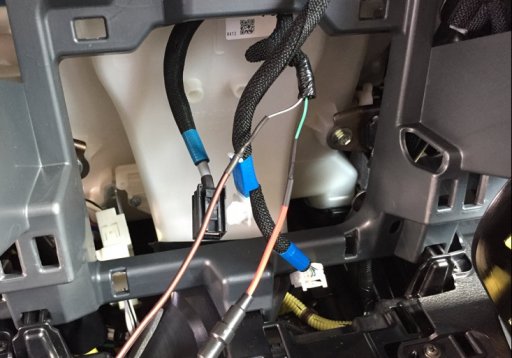
First mod was to add two USB outlets and battery voltage display. Cut the 12v plug off and soldered the new plug into place.


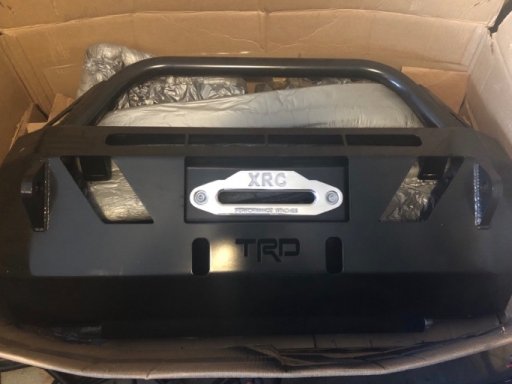
Next was to get rid of the silver on the front until I can pick up a replacement Hybrid bumper. Sprayed with plastidip as a temporary fix. Around this same time I did a 1”/1.25” spacer lift from Burtman Ind. (I didn’t get any pics during he lift)


I had my OB badge for sometime but never mounted it on my older rigs. Decided it was time to show my support.


I don’t have any pics of it but the family got me an Alpine ilx-f309 for christamas which got installed also. So, now I have access to vehicle information that really should be included with the 4runner (i.e. tire pressure/temp, doors opening and vehicle specific settings). I’ll get more pics up soon of other mods I’ve made recently but haven’t saved to flikr. We are planning a trip to Ouray, CO in the coming weeks so there were a few things I wanted to be sure to knock out before going.
 

tchughes

Rank IV
Launch Member

Traveler III

1,210
Central Arkansas
First Name
Tim
Last Name
Hughes
Member #

1710

@tchughes I like your USB/battery voltage thing. How did you wire it up?
I pulled the original 12v outlet and cut the wires, soldered and heat shrink the connection. I did have to open the hole a little to make it fit, it's not and exact fit so it's a permanent change. It's nice being able to monitor the battery voltage although it is off a couple tenths of a voltage from my Fluke DMM. I'm thinking about putting something similar in the back of the console for back seat passengers but haven't gotten that far yet. They also offer one with USB-C and USB A if you need USB type C.
 

trail_runn4r

US Rocky Mtn. Local Expert. Colorado: Denver Area
Member

Pathfinder III

4,815
Denver, CO, USA
First Name
Carlo
Last Name
Donzelli
Member #

16845

I pulled the original 12v outlet and cut the wires, soldered and heat shrink the connection. I did have to open the hole a little to make it fit, it's not and exact fit so it's a permanent change. It's nice being able to monitor the battery voltage although it is off a couple tenths of a voltage from my Fluke DMM. I'm thinking about putting something similar in the back of the console for back seat passengers but haven't gotten that far yet. They also offer one with USB-C and USB A if you need USB type C.
Cool, do you have any pictures of the wiring by any chance? Do you remember which wires colors you connected?
 

tchughes

Rank IV
Launch Member

Traveler III

1,210
Central Arkansas
First Name
Tim
Last Name
Hughes
Member #

1710

I pulled the original 12v outlet and cut the wires, soldered and heat shrink the connection. I did have to open the hole a little to make it fit, it's not and exact fit so it's a permanent change. It's nice being able to monitor the battery voltage although it is off a couple tenths of a voltage from my Fluke DMM. I'm thinking about putting something similar in the back of the console for back seat passengers but haven't gotten that far yet. They also offer one with USB-C and USB A if you need USB type C.
Cool, do you have any pictures of the wiring by any chance? Do you remember which wires colors you connected?
From the pic it looks like the red power went to green and the black ground went to the white/black. I suggest checking it with a multi-meter or test light.
 

Attachments

  • Like
Reactions: trail_runn4r

tchughes

Rank IV
Launch Member

Traveler III

1,210
Central Arkansas
First Name
Tim
Last Name
Hughes
Member #

1710

@the_runn4r I just noticed you are in the Denver area, the family and I will be heading to Ouray in a couple weeks, got any suggestions for that area?
 

tchughes

Rank IV
Launch Member

Traveler III

1,210
Central Arkansas
First Name
Tim
Last Name
Hughes
Member #

1710

Something I knew I wanted but did't want to spend a bunch of money on was some sort of electrical management. I didn't want relays mounted everywhere and electrical runs all over the place. I wanted something clean, inexpensive and easy to troubleshoot. Also, I wanted the interior to remain clean and stock looking. At this time I was also looking at new stereos (Toyota infotainment system are terrible) and the Alpine Halo interested me. I discovered I can control relays using Alpine's KAC-001 Control Module which allows up to 8 switches controlled by the stereo. My wife and kids got me the stereo and module for Christmas and I started sourcing parts for a DIY power/relay board. I stepped up completion a couple weeks ago with our plans to Ouray getting closer and I knew I would need to get my ARB twin installed from my previous build.

I measured the engine bay area on the drivers side next to the power brake and mocked up a board for layout.


Most of the parts are from Blue Sea since I felt I could trust the quality. I ordered a box of relays and harnesses but needed some board to mount it on. I found cutting board locally that was black and would meet my needs.


I made some brackets from angle and used empty factory captured nuts in the fender to hold that side. I bent some 1/8" metal for the side near the engine and used an existing mount there to hold that side. Drilled some holes in the cutting board to run wires and keep the top clean. I used a circuit breaker for any potential shorts before going to the Blue Sea power distribution. Also, the Alpine unit supplies a ground to trigger the relays and since there were eight connections I used Cat 5 ethernet cable to run through the firewall. This helped keep everything clean and all I had to do was wire these eight connections to the relays to trigger via an ethernet plug. If I need to take the board out there are only two wiring connections (ethernet and battery) and three screws and the whole board can be removed.


Once the wiring was done I got the ARB installed.


trail_runn4r

US Rocky Mtn. Local Expert. Colorado: Denver Area
Member

Pathfinder III

4,815
Denver, CO, USA
First Name
Carlo
Last Name
Donzelli
Member #

16845

@the_runn4r I just noticed you are in the Denver area, the family and I will be heading to Ouray in a couple weeks, got any suggestions for that area?
I can suggest you stuff around Denver but I don't know much about Ouray, other than the most famous trails. @Neal A. Tew was there recently, he might be able to help you out!
 
  • Like
Reactions: tchughes

EffinNewGuy

Rank IV

Enthusiast II

979
Greenville, SC
First Name
S
Last Name
B
Member #

29467

Seriously starting to consider an slightly used 3-5 y/o 4Runner, so these builds are inspiration for me. Thanks for sharing. Especially, since I'll be doing an extremely slow build.
 
  • Like
Reactions: tchughes