2008 Silverado Build

  • HTML tutorial

jbstrait

Rank I
Launch Member

Traveler I

233
Seattle
Member #

8953

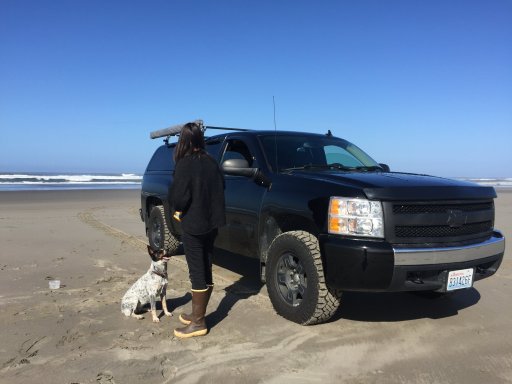
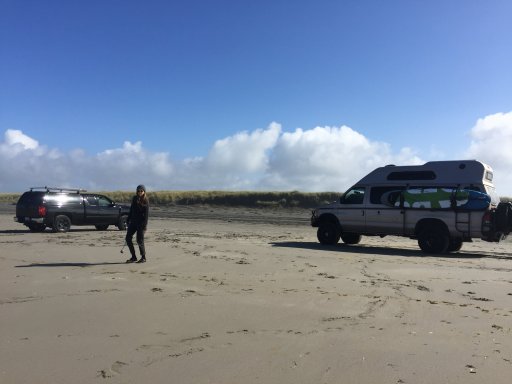
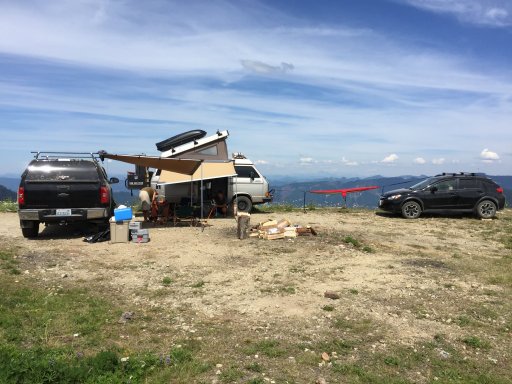
I got my Silverado 4 years ago and it's taken me on a ton of adventures. It's become my way to get out of the city, rally down forest service roads, and set up my little home away from home.

2008 Chevrolet Silverado LT
4wd w/ factory locking rear differential

Modifications
Duratrac 285/70R17 on stock rims
ReadyLIFT leveling kit
1.75" BORA Spacers
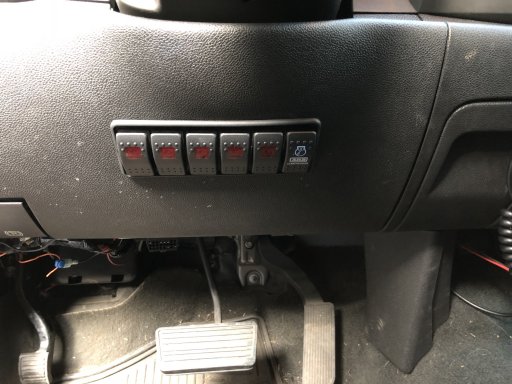
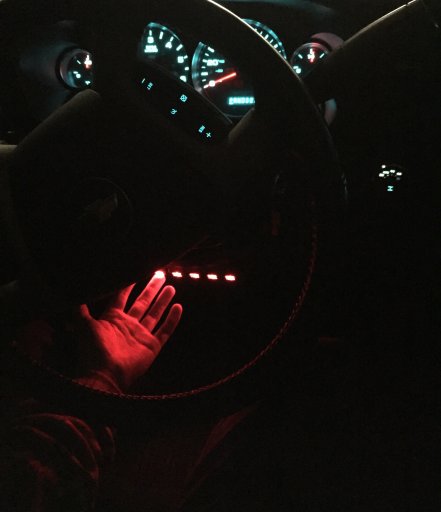
sPOD - universal 6 switch
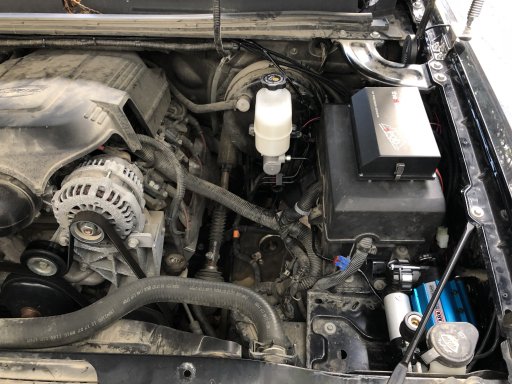
ARB compressor
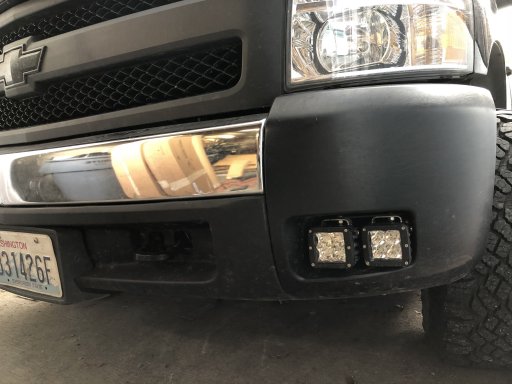
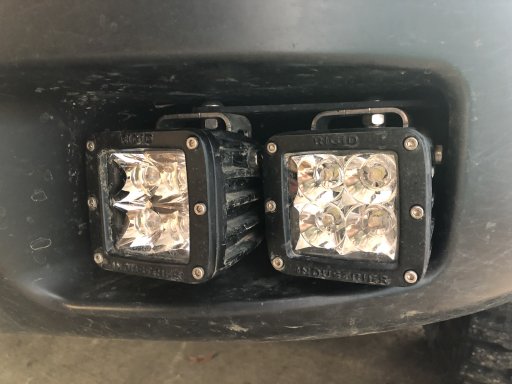
Rigid Dually flood and spot lights (front)
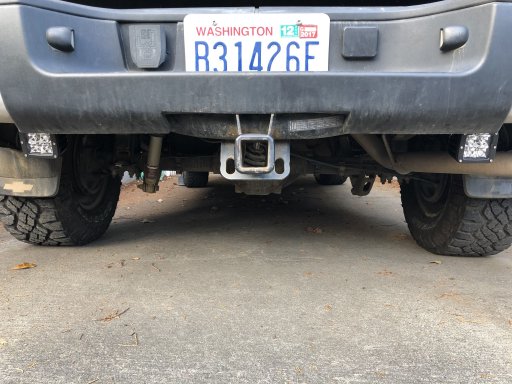
Rigid Dually flood lights (rear)
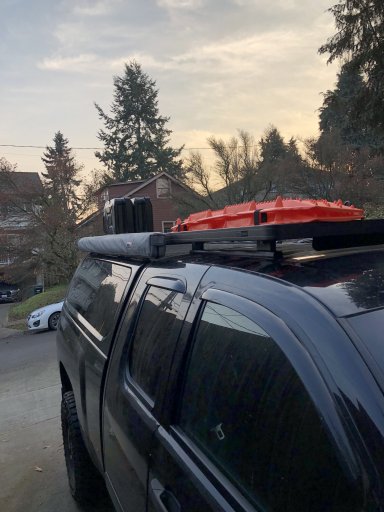
Front Runner Slimline 2 roof racks
ARB awnings
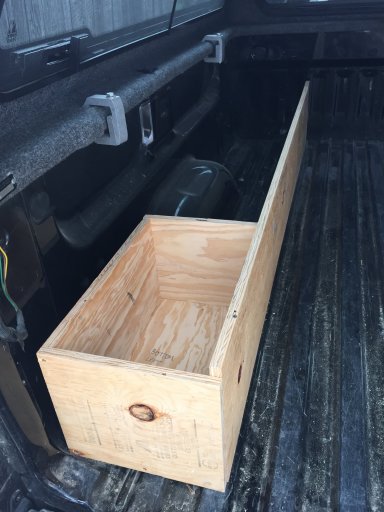
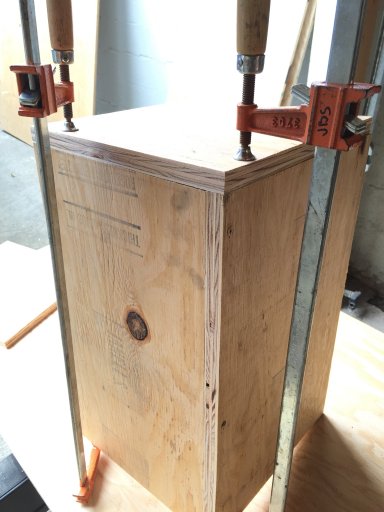
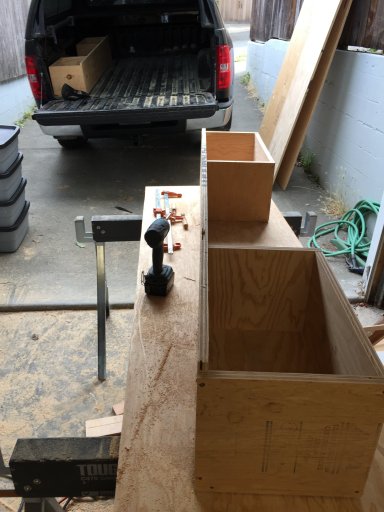
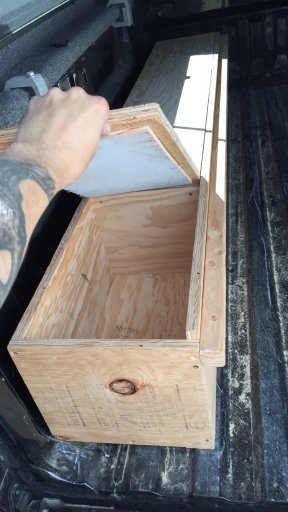
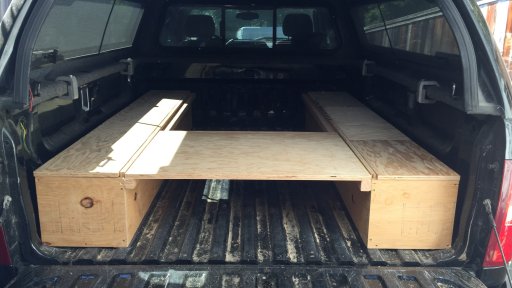
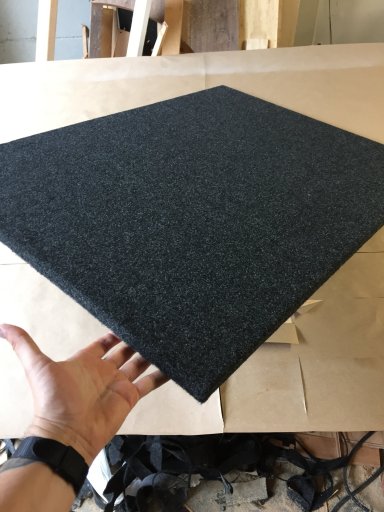
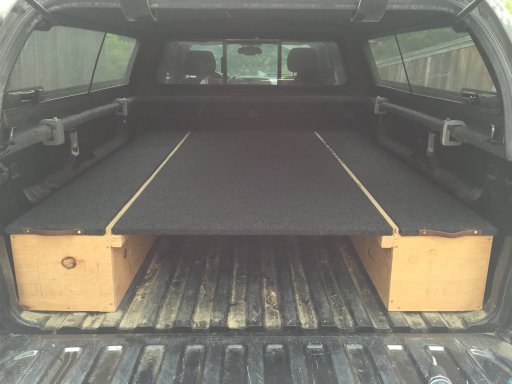
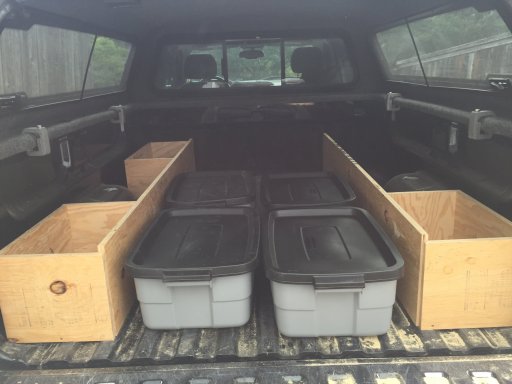
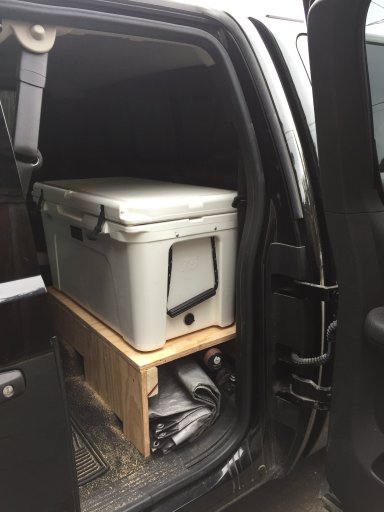
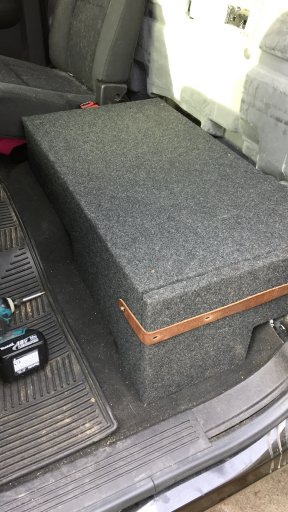
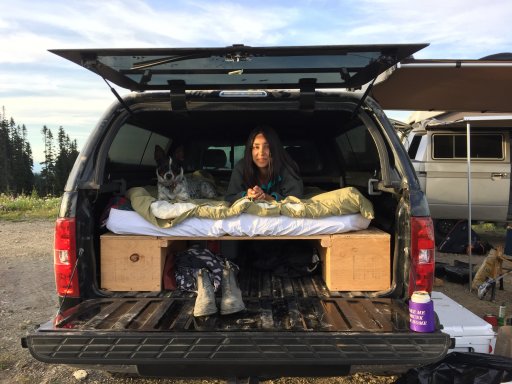
Plywood sleeping area

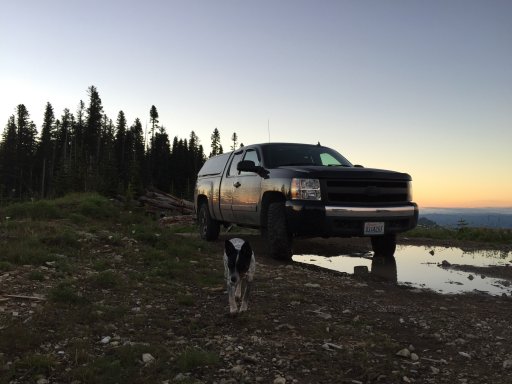
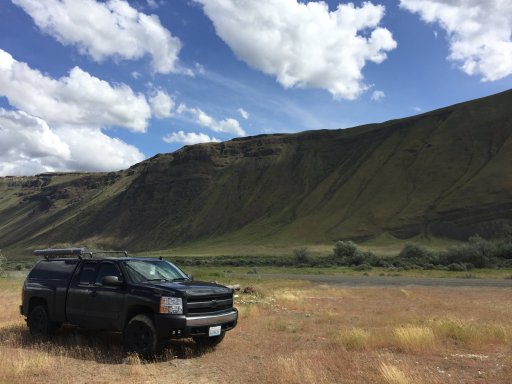
I'm posting some older photos that show the truck in different stages of the build. I'll add some details on the different parts of the build and then some of the up to date pictures with the Slimline racks (just added last weekend).

2016-09-18 10.50.42.jpg 2016-09-18 10.56.25.jpg 2016-08-13 14.38.59.jpg 2016-08-13 19.08.26-1.jpg 2016-07-23 20.51.05.jpg 2017-05-05 15.06.53.jpg 2017-12-09 15.30.28.jpg
 

jbstrait

Rank I
Launch Member

Traveler I

233
Seattle
Member #

8953

Just added rear auxiliary lights since I can't really see when backing up at night, even in town. I also got the sPOD system which I installed at the same time last weekend. I've been running the front lights for half a year just with the supplied Rigid switches, but moved them over to the sPOD. I'm using 3 switches: 1 for the front flood pair, 1 for the front spot pair, and 1 for the rear flood pair. The rear lights are just bolted to the tow hitch frame and the fronts are in an adapter Rigid makes for Silverado fog light holes in the bumper.

2017-12-13 14.28.28.jpg
2017-12-13 14.34.08.jpg
2017-12-13 14.30.46.jpg

The only spot on my dash area that had enough space for the sPOD switches (the clearance behind the panel is really tight most places) was straight under the steering wheel. I wasn't sure if I'd like it but I really do, it's easy to push the switches with my hand resting on my knee and when it's dark the lights aren't blinding, they just glow in my periphery.

2017-12-13 14.29.36.jpg 2017-11-29 20.47.53.jpg
I mounted the sPOD on the fuse box which they suggest and it fits perfectly. I ran all the wires along the fender which hides and holds them in place.

2017-12-13 14.26.50.jpg
Side note: the ARB compressor is really easy to set up with the sPOD, they sell a little wiring harness addition that removes a big bundle of the stock ARB wires. I rivnut mounted the compressor the the fender panel in the area a 2nd battery would go. I guess I'll have to move that if I go dual battery but it's an easy spot for now.
 

martinezpj90

Rank 0

Traveler I

Just bought a ‘17 Silverado 1500 with the LTZ package that I plan on building as a somewhat overlander. Take on hunting and fishing trips but be able to commute to work when need be. I have been researching the Spod system and have too come to the point of conclusion that the Spod system will only mount under the steering wheel or on a ram mount. Is there a reason you didn’t do the ram mount over the conventional mount? Looking for any insight before I pull the trigger on this expensive, but worth it, system.
 

jbstrait

Rank I
Launch Member

Traveler I

233
Seattle
Member #

8953

Just bought a ‘17 Silverado 1500 with the LTZ package that I plan on building as a somewhat overlander. Take on hunting and fishing trips but be able to commute to work when need be. I have been researching the Spod system and have too come to the point of conclusion that the Spod system will only mount under the steering wheel or on a ram mount. Is there a reason you didn’t do the ram mount over the conventional mount? Looking for any insight before I pull the trigger on this expensive, but worth it, system.
Rad, excited to see your build. To be honest, I ordered the sPOD before knowing if there was good dash clearance—I sort of assumed. That being said, I do like where I installed mine since they are more discreet and one of my hands is usually resting on my knee right there next to them, so it's easy to push the buttons.

Regardless of how you mount them, the sPOD is totally worth the cost in my opinion. Great product.
 

martinezpj90

Rank 0

Traveler I

Rad, excited to see your build. To be honest, I ordered the sPOD before knowing if there was good dash clearance—I sort of assumed. That being said, I do like where I installed mine since they are more discreet and one of my hands is usually resting on my knee right there next to them, so it's easy to push the buttons.

Regardless of how you mount them, the sPOD is totally worth the cost in my opinion. Great product.
Good to hear. Is the part that you mounted the switches on removable for access to fuses? I can’t remember the setup but notice mine is detachable. Just wondering if the backing of the switches would interfere with other wiring or plastics that I should be on the lookout for since you said it was a pretty tight fit
 

jbstrait

Rank I
Launch Member

Traveler I

233
Seattle
Member #

8953

Good to hear. Is the part that you mounted the switches on removable for access to fuses? I can’t remember the setup but notice mine is detachable. Just wondering if the backing of the switches would interfere with other wiring or plastics that I should be on the lookout for since you said it was a pretty tight fit
Yeah the whole panel comes off, all interior dash panels do pretty easily. You take off the interior fuse panel cover, unbolt the parking brake lever (chock your wheels or you'll scare the crap out of yourself when the parking brake disengages), and then there's a couple screws and some clips you just pop off.

I used interior panel removal tools, you can get a set at harbor freight for cheap and just removed a bunch of the dash to find the right spot. I'd suggest that, so you can really see where you should mount it. Plus you'll need to remove them to cut a hole for the switches. There is potentially a good spot under the CD player but the computer is there on mine and I didn't want to relocate that.
 

martinezpj90

Rank 0

Traveler I

Yeah the whole panel comes off, all interior dash panels do pretty easily. You take off the interior fuse panel cover, unbolt the parking brake lever (chock your wheels or you'll scare the crap out of yourself when the parking brake disengages), and then there's a couple screws and some clips you just pop off.

I used interior panel removal tools, you can get a set at harbor freight for cheap and just removed a bunch of the dash to find the right spot. I'd suggest that, so you can really see where you should mount it. Plus you'll need to remove them to cut a hole for the switches. There is potentially a good spot under the CD player but the computer is there on mine and I didn't want to relocate that.
My rig has the 3rd person front seat so underneath the stereo and climate controls is a fold out storage compartment that barely fits a wallet or the space beside it occupied by a Car charger port. not really any trim pieces to mount to besides that except for underneath the steering wheel which might be ok if I ever sell the rig. just purchase a whole new panel for hopefully not that much cash and bam like nothing happened lol. I have tons of things I WANT to do, but damn purchasing stuff to be shipped up here is a PITA. for example shipping a bumper is almost as much as the bumper itself.
 

jbstrait

Rank I
Launch Member

Traveler I

233
Seattle
Member #

8953

One of the first things I did on my truck was build a platform to sleep on and store things under. There's a million ways people build them, so I just jumped in and built what I thought would be good for me knowing full well I may just rebuild it later. I knew only after putting it to use can I have opinions on what to do differently.

2016-08-07 14.25.21.jpg
2016-08-07 14.47.06.jpg
2016-08-07 16.28.53.jpg
2016-08-12 10.47.34.jpg
2016-08-12 11.01.37.jpg
2016-08-21 10.39.58.jpg
2016-08-21 11.27.21.jpg

I decided on building it this way so I could store bins and even wood underneath, but also roll the bed up and move the middle panels if there's odd shaped gear. The parts that touch my bedding are covered in sub-woofer box fabric which is adhered with Super 77 spray and has held up great. I put simple leather pulls on the side lids which works perfect. I get in those more than anything else (the other storage spots are recovery gear, air hoses, seasonal equipment, etc) and the handles are all I need. I intentionally steered clear of hinges and drawers because I wanted this first build to be simple, modular, cheap, and impermanent.
 

Attachments

  • Like
Reactions: martinezpj90

jbstrait

Rank I
Launch Member

Traveler I

233
Seattle
Member #

8953

After I built the bed platform there was no room for my cooler anymore and I wanted a permanent spot. I have the Yeti Tundra 75 which is exactly the size of the Silverado double rear seat. I never have passengers over there so it was an easy decision to pull the seats and build a platform for the cooler.

2016-08-07 09.41.00.jpg
2016-12-28 12.29.54.jpg

I used an old guitar strap to hold the side lid on. With the seat gone, there's more room for storage—I keep fishing gear and tools in there.
 
  • Like
Reactions: martinezpj90