Member III
- 2,771
- First Name
- Rolando
- Last Name
- Nispiros
- Member #
-
17011
- Ham/GMRS Callsign
- KN6JJS
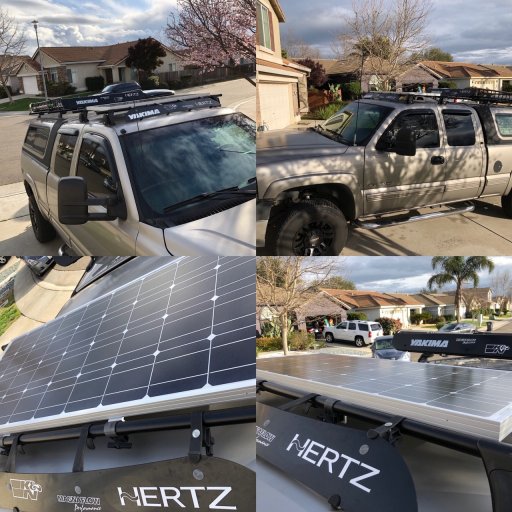
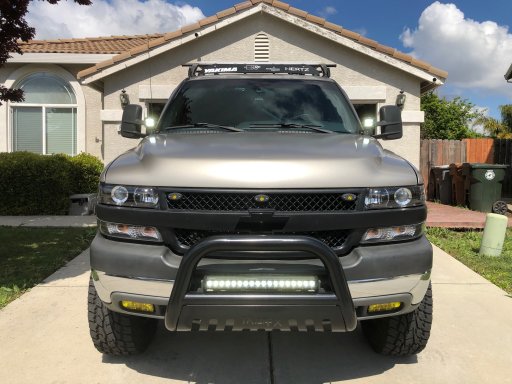
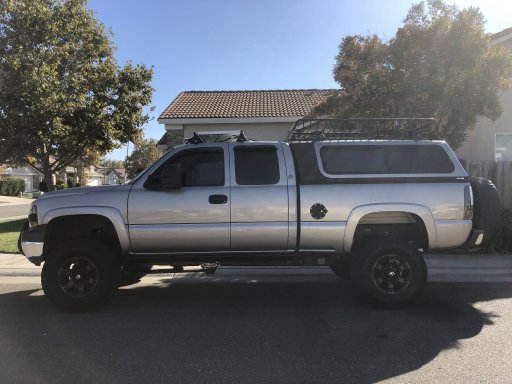
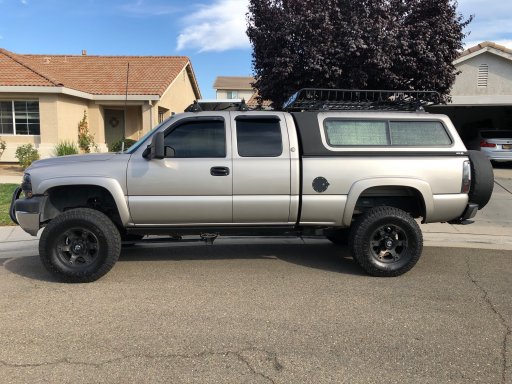
My 2002 Chevy Silverado 2500HD Vortec 6.0L V-8 Gas 4x4 Ext. Cab 300hp 4.10 Axle ratio. Purchased with in 2016 with 99k miles.
Since 11/25/16 completed the following to this otherwise stock truck with towing package:
Exterior
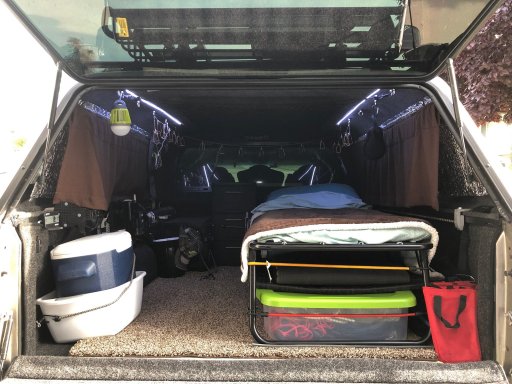
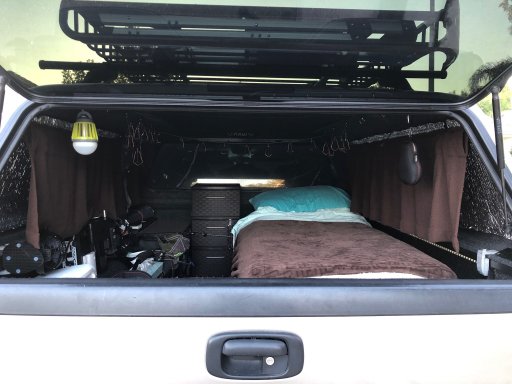
- Added A.R.E. Overland truck camper shell topper
- Added BedRug Truck Liner
- Added missing tailgate bumper/stopper
- Added Pop Lock to tailgate handle
- Added a DeeZee tailgate assist
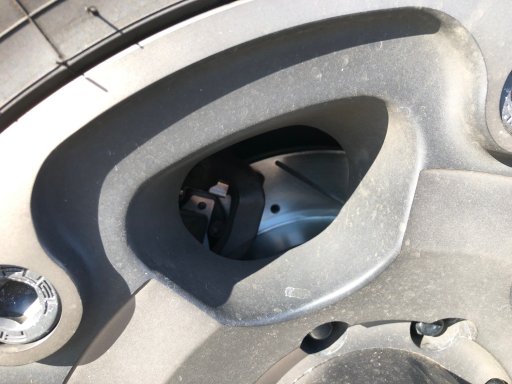
- Replaced fuel door with black locking door
- Added 60" LED tail light bar
- Added 60" pair LED truck bed lights
- Added deer whistles
- Wilco Off-Road Hitch Tire Carrier with 3.5 FuelPax Gas Can and Mount
- Added 4.5 Gallon FuelPax Gas Can and Mount to Yakima rack
- Trasheroo Garbage Bag over Tire Carrier
- Bestop TrekStep
- Bestop Tire Cover
- Added Yakima Roof Rack System with Mega Load Warrior Rack with extension
- Added Yakima SlimShady Awning
- Added Yakima Shovel Mount
- Added Yakima Spare Tire Mount
- Added RoadShower 4S
- Llumar Pinnacle Window Tint 30% front and 5% back
- Lamin-X Yellow Protective Tint over fog lights
- Replace Carbon Fiber bow tie wrap with matte black metal bow tie
- Rocker panel black paint over power bar
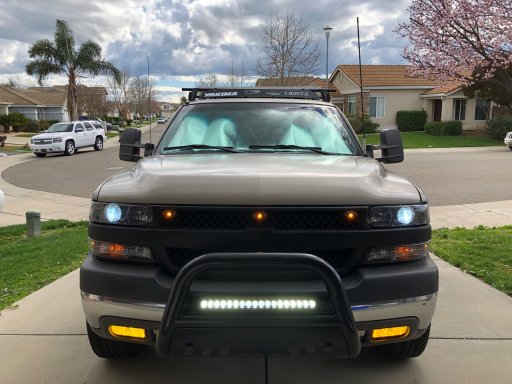
- Added TrailFX Bull Bar and 20" TrailFX single row LED flood lights
- Came with 45 gallon gas tank just recently discovered on 1/1/19
- B&M 10.5" Aluminum Rear Differential Cover with Corporate Gasket
Suspension, Tires, and Performance
- Added Pro Comp 6" Lift Kit with Pro Comp Pro Runner Shocks and Add-a-Leaf kit
- Replaced stock upper control arms and tie rods with MOOG components
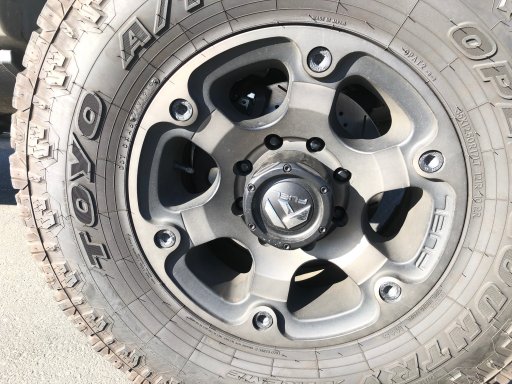
- Added Fuel Beast Rims 17 x 9 with 17" Toyo Open Country A/T II 35 x 12.5 x 17 tires
- Changed stock muffler to 22" Magnaflow and 12" x 4" black powder coated tip
- K&N Cold Air Intake System and K&N Cover (came with truck)
- Replaced spark plug wires with Taylor Racing Wires 10.5m
- Removed all OEM badges and door protectors
Lighting
- NINEO LED 6500k LED High Beams
- DDM Tuning 6500k HID Low Beams
- DDM Tuning 3000k HID Fog Lights
- Depo projector headlights with matching daytime running light housing
- All internal and external auxiliary lights swapped out for LED bulbs
- Changed my Daytime Running Lights to amber LEDs
- Smoked LED Tail Lights
- LED 3rd Brake Light
- Rear facing LED yellow strobe lights
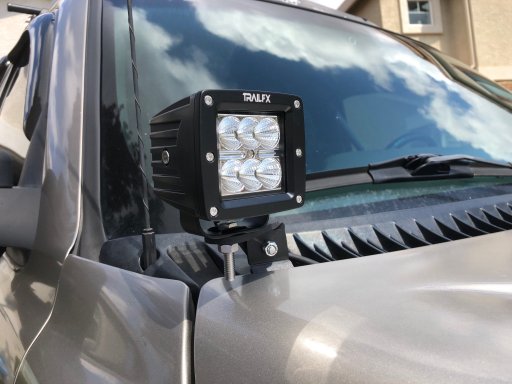
- Front facing LED yellow pod lights with Lamin-X amber film
Interior
- Added all weather mats from Weathertech front and back
- Hooked up my Valentine1 Radar with Blendmount and MirrorTap
- Added Goluk T2 Dashcam to the front only
- Added 3 port USB port for electronics
- Add ScanGauge II to OBD port
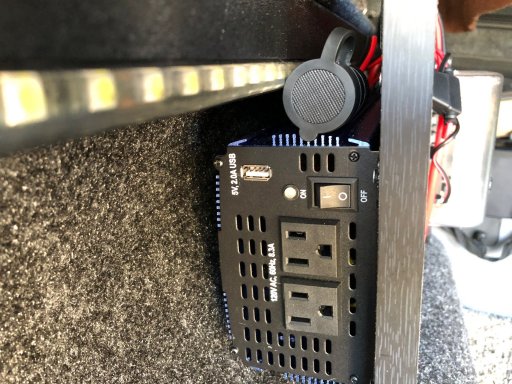
- Blue LED interior light strips
- Replaced broken mirror wire cover
Audio and Gadgets
- Replaced stock radio with single DIN AVH-3300NEX 7" Flip Out DVD Receiver
- Replaced stock speakers with Hertz Speakers
- Added Audison 10" enclosed subwoofer - APBX 10 DS
- Added JL Audio RD400/4 NexD 4 Channel Class D Car Audio Amplifier
- Added Soundstream PN1.650D 650W Monoblock Picasso Nano Class-D Amplifier
- Added Soundstream 10" flip down DVD Player with attached Roku Player
- Added Pyle backup camera kit
- Replace Pyle camera with Raayoo camera
- Added Uniden 980SSB CB with antenna hood mount
- Added Midland MTX105 GMRS Radio
- Added Weboost Drive Reach Cell Phone Booster
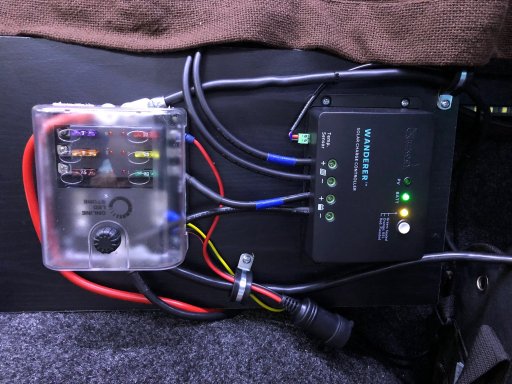
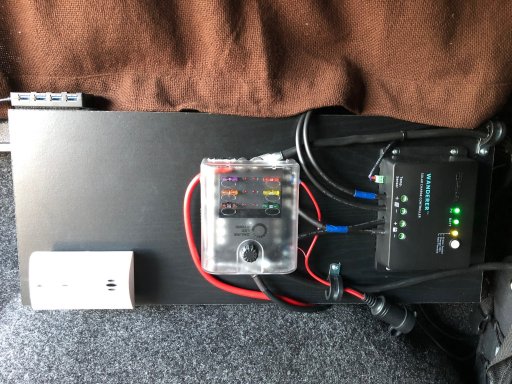
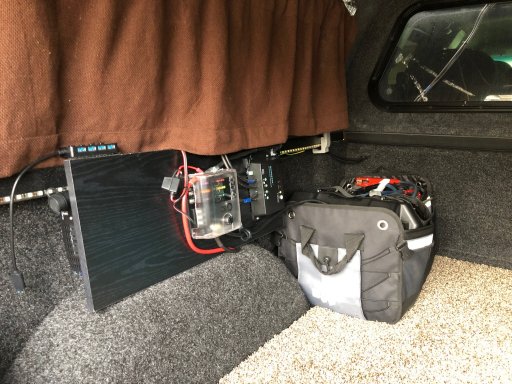
- Renogy 100W Monocrystalline Solar Panel Kit with 30amp Charge Controller
- Renogy 100Amp Hour AGM Battery
- 1000W Wagan Pure Line Inverter and Remote Switch and 180amp Fuse Box
- Added EMP Shield for main battery and solar battery.
- Powerbuild Jack
- VIAIR 400P Air Compressor
- Dometic CFX28 Cooler and insulated cover
- Too many to list lol
I can upload any detailed pictures upon request.
Mods to be done/wish list:
- Repaint/fix faded paint/clear coat on roof
- Replace roof head liner
- Replace PWN solar charger with MPPT when someone makes it smaller
- Add DC-DC charger once I understand how to install it from engine bay to camper shell where solar battery is located
- Install dual battery once I watch enough YouTube videos and grow a pair
- Find/make a mod to cover gap where main battery and hood is placed. Seems like a wide gap between hood and side of truck.
- Find a way to fix / replace bolt that fell off engine cover
Since 11/25/16 completed the following to this otherwise stock truck with towing package:
Exterior
- Added A.R.E. Overland truck camper shell topper
- Added BedRug Truck Liner
- Added missing tailgate bumper/stopper
- Added Pop Lock to tailgate handle
- Added a DeeZee tailgate assist
- Replaced fuel door with black locking door
- Added 60" LED tail light bar
- Added 60" pair LED truck bed lights
- Added deer whistles
- Wilco Off-Road Hitch Tire Carrier with 3.5 FuelPax Gas Can and Mount
- Added 4.5 Gallon FuelPax Gas Can and Mount to Yakima rack
- Trasheroo Garbage Bag over Tire Carrier
- Bestop TrekStep
- Bestop Tire Cover
- Added Yakima Roof Rack System with Mega Load Warrior Rack with extension
- Added Yakima SlimShady Awning
- Added Yakima Shovel Mount
- Added Yakima Spare Tire Mount
- Added RoadShower 4S
- Llumar Pinnacle Window Tint 30% front and 5% back
- Lamin-X Yellow Protective Tint over fog lights
- Replace Carbon Fiber bow tie wrap with matte black metal bow tie
- Rocker panel black paint over power bar
- Added TrailFX Bull Bar and 20" TrailFX single row LED flood lights
- Came with 45 gallon gas tank just recently discovered on 1/1/19
- B&M 10.5" Aluminum Rear Differential Cover with Corporate Gasket
Suspension, Tires, and Performance
- Added Pro Comp 6" Lift Kit with Pro Comp Pro Runner Shocks and Add-a-Leaf kit
- Replaced stock upper control arms and tie rods with MOOG components
- Added Fuel Beast Rims 17 x 9 with 17" Toyo Open Country A/T II 35 x 12.5 x 17 tires
- Changed stock muffler to 22" Magnaflow and 12" x 4" black powder coated tip
- K&N Cold Air Intake System and K&N Cover (came with truck)
- Replaced spark plug wires with Taylor Racing Wires 10.5m
- Removed all OEM badges and door protectors
Lighting
- NINEO LED 6500k LED High Beams
- DDM Tuning 6500k HID Low Beams
- DDM Tuning 3000k HID Fog Lights
- Depo projector headlights with matching daytime running light housing
- All internal and external auxiliary lights swapped out for LED bulbs
- Changed my Daytime Running Lights to amber LEDs
- Smoked LED Tail Lights
- LED 3rd Brake Light
- Rear facing LED yellow strobe lights
- Front facing LED yellow pod lights with Lamin-X amber film
Interior
- Added all weather mats from Weathertech front and back
- Hooked up my Valentine1 Radar with Blendmount and MirrorTap
- Added Goluk T2 Dashcam to the front only
- Added 3 port USB port for electronics
- Add ScanGauge II to OBD port
- Blue LED interior light strips
- Replaced broken mirror wire cover
Audio and Gadgets
- Replaced stock radio with single DIN AVH-3300NEX 7" Flip Out DVD Receiver
- Replaced stock speakers with Hertz Speakers
- Added Audison 10" enclosed subwoofer - APBX 10 DS
- Added JL Audio RD400/4 NexD 4 Channel Class D Car Audio Amplifier
- Added Soundstream PN1.650D 650W Monoblock Picasso Nano Class-D Amplifier
- Added Soundstream 10" flip down DVD Player with attached Roku Player
- Added Pyle backup camera kit
- Replace Pyle camera with Raayoo camera
- Added Uniden 980SSB CB with antenna hood mount
- Added Midland MTX105 GMRS Radio
- Added Weboost Drive Reach Cell Phone Booster
- Renogy 100W Monocrystalline Solar Panel Kit with 30amp Charge Controller
- Renogy 100Amp Hour AGM Battery
- 1000W Wagan Pure Line Inverter and Remote Switch and 180amp Fuse Box
- Added EMP Shield for main battery and solar battery.
- Powerbuild Jack
- VIAIR 400P Air Compressor
- Dometic CFX28 Cooler and insulated cover
- Too many to list lol
I can upload any detailed pictures upon request.
Mods to be done/wish list:
- Repaint/fix faded paint/clear coat on roof
- Replace roof head liner
- Replace PWN solar charger with MPPT when someone makes it smaller
- Add DC-DC charger once I understand how to install it from engine bay to camper shell where solar battery is located
- Install dual battery once I watch enough YouTube videos and grow a pair
- Find/make a mod to cover gap where main battery and hood is placed. Seems like a wide gap between hood and side of truck.
- Find a way to fix / replace bolt that fell off engine cover
Attachments
-
 1.1 MB Views: 49
Last edited: